Showing posts with label Scenery. Show all posts

Thursday 7 June 2018

Alien Trees 2 6mm-15mm or 28mm Scrub

In my continuing push to make scenery for my Mechanoid game, I was considering the plastic aquarium plant selections, but they all seemed to big and didn't do it for me. I wanted small leaves.

I also wanted an alien feel to them so green was a no go.

In a previous article I talked about making Alien trees these were for 28mm 40K games. These were wire and string efforts. I pushed the idea on with variants for Saga/Frostgrave producing a very tall Cedar of Lebanon. In 40K you also need some Jungle Terrain and you can make that with plastic aquarium plants, the problem being with them that they are too low. However by threading them through a kebab stick fixed in a drilled mdf board, you can have almost as much height as you want.

Mind open to ideas I waited, I find if I go looking for stuff I wont find it, it has to be a light-bulb moment and is often better because of it. I also find that if I don't feel like moving forwards with the plan then there is something, some point I've missed. So I wait for fruition, of course some times it's instant but I wasn't happy with my plans.

It grew on me:
1) the red flock
2) getting a mat with red patches on it.

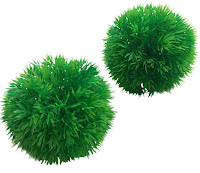
Then I found a plant option I pulled a few bit out in the store to check it out and the leaves were perfect, I pushed the small spray back on and bought it, in fact I've been back to buy a second and 'Oh there is a large green ball too!'

But... it was mauve, I tried to think of it as purple as that would fit better but it is most definitely the blue side of purple, mauve trees on an alien planet? Why not, but yet...


I played around with the idea and used cocktail sticks as the holes were smaller than aquarium plants. I threaded 2-5 pieces on each stick to increase height and thickness of the 'plant'.


You get the idea. And there I stopped, dithered.
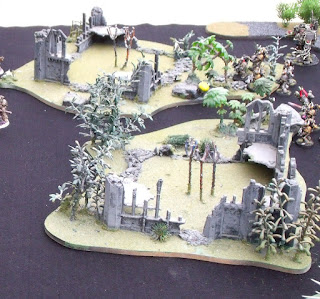


The the light-bulb moment was more a memory as I went through stuff from way back in the 1990's the precursors to the jungle terrain I'd made for my 9 year old son (who am I kidding? and me!).

The foliage had come from a supplier of artificial planets to florists. This is way back in time before plastic aquarium plants! The items were gold in colour so I'd spray painted them green, in time the green had peeled off.

But now I had proper plastic foliage and proper acrylic spray paint, in fact I had Blood angel Red or Dragon red depending on your supplier and voila, now we are motoring!

N.B. don't be too accurate with your red paint, green and mauve showing through adds belief.

My usual wood filler as basing material on to small MDF bases and some larger ones, can't use CDs as I want to drill trough them and glue my cocktail sticks in. Black spray the bases, dry brush grey and then almost white, as described earlier, flock then drill hole from top through base onto old wood, not wife's favourite table top, as if (cough). For variety do a large base and clump it with 4 sticks.I use the small plants as scatter on my wood defined areas, moving them to one side as unts pass through, the larger bases I place as individual clumps of impenetrable, LOS blocking, dense terrain.


Cocktail stick pushed in from below point first, then last bit  glued before final push through base. At this point my youngest kitten jumped on to the table I had 20 of these bases out and at that moment they looked like a field of caltrops I had visions of a stabbed paw and a large vet's bill. (Never mind the flack from CiC/SWMBO.)

However after threading the plants on I stuck a small bead on the top, it looks like the budding growth point of the plant - need is the mother of invention and inspiration.

I've made these for 6mm, they'd work for 10-15, just lengthen the cocktail stick my max length was 2/3rds. OFC they would also make good scrub for 28mm, and that's what I like versatility.

Hope you approve.

Tuesday 5 June 2018

Mechanoid Domes - construction

Having made your Mechanoid army you want suitable scenery.

A lot of the games we have been playing on are on a Tinywar games Terminator mat with the 28mm iconography (tyres/skeletons/roads) removed and lately with red grass printed on it. See link

I now wanted a Mechanoid base or settlement but what to use. I was thinking of the Eden Garden Project for this.


With this in mind I went about normal life with what you know is a 'Wargamers eye', a request came in from my CiC to go to IKEA, and I was happy enough to go along with the idea even if it was only for the Swedish Meatballs. As ever we went to the left over bin, with old or damaged or ex-display stock and there it was my Mechanoid settlement. The CiC saw me looking at the redundant Xmas tree decorations, saw the look in my eye and said, buy it. She knew there would be no peace until I had. For less than £1 I bought two packets.

Once home and other duties complete I got out the old hacksaw and cut the very top off one and I cut the second in two about a third of the way down from the top. With that moment of instant creativity that sometimes catches you I  placed the small top of the first cut on top of the smaller top end of the second which gave me a small dome with satellite dish
In the image below you can see the just cut examples, the decoration to the right awaiting its turn.


I didn't expect to get three domes from two ornaments or indeed as I repeated the sequence six domes from four; it seems I bought too many ornaments, guess they can go on thee tree next year.

I based these up on old CD's first putting on a layer of wood filla I applied 'Copydex' (a latex glue) to the bottom of the ornaments and pushed them home. This basing system requires an overnight rest to bond well, but has the advantage of being very strong until you add a lot of water whereupon you can easily separate them with out damage to the models or scenery. However ready or not I could photograph them and here they are with newly painted Mechanoids, these have matching black bases.


Dry brushed and flocked they await the first game. The red flock/static grass is a home made mix of various reds and browns purchased from e-bay. The red bushes are pulled from the centre of a floor cleaner/polisher, the bit that is discarded to fit onto the head. 

I was going to paint or ink the domes, but thought hell no, let the alien sun shine brightly on the domes.


The green dials/observation nodes have since changed shape, and have been repainted as oblong like slits.

Mechanoids establish their grip on their new world

Every Mechanoid planet needs a name and this one they called; 01011010 01001011 00110010 00110101 00110001 00101111 00110011

As they move from the highlands where they landed and move down to the lowlands they encouter areas of 'fertile' scrubland, this they ignore, aware only of the possibility of hidden predators they push on seeking out the metals they need to create new Mechanoid life, the circuitry and metal carapaces.


Wednesday 30 May 2018

Mechanoids settle a new world.

I have been playing Future War Commander and wanted a new cloth.

I wanted an alien planet look.

A friend had already purchased a cloth from Tiny Wargames that gave me part of the look I wanted and as a previous purchaser I knew the product was of high quality and that they were prepared to supply the customer with what they wanted.

My request was straightforwards.

I wanted the Terminator cloth they supply but without the 28 mm elements, i.e. no skeleton, no tyres no road.
To further confuse I wanted red grass on it, if you see their arid cloth and then look at the arid cloth with grass you will understand what I wanted.
An exchange of emails, including photos to check his understanding of what I want and it was delivered today.

I was delighted and threw the cloth over the table and as it happens over some 'Really Useful Boxes'.
The effect was dramatic, so I hung an old star speckled cloth behind it and placed some of my Mechanoid force upon it.

If you want a cloth relevant to your game I can only recommend Tiny Wargames they are brilliant.

More on the Mechanoid models and scenery later.


N.B. I order a 7' x 5' cloth so I can throw it over hills and still have a 6' x 4' table to play on.
I think it looks better than placing hills on the cloth as they never quite match.

Establishing control

Monday 27 November 2017

'Epic' buildings from Blotz.

Warfare was on this weekend and followed the usual pattern:
  First check out the ‘bring and buy’ for 6 mm or 10 mm figures.
2  Collect Pre-orders at Baccus, Commission Figurines and get bases from Minibits
 Walk around the show seeing what is new, and looking at demo and participation games for scenery/terrain ideas and new games.

This time I came across a trader I hadn’t seen before, Blotz, they had some beautiful well detailed buildings in 28 mm, 20 mm, 15 mm and 10 mm and did my eyes deceive me 6 mm!

I was impressed by their ‘Epic style’ 1920’s Mid-West collection, they certainly looked the part. I was encouraged to pick them up and discovered they were designed in stacks; base unit, middle block and top and they also sell all the items individually so you can add more middle units to vary the heights of the same building type or indeed swop the top to the damaged unit. You could even remove floors in game as the building received more hits changing the LOS.
So I bought 6 buildings and the 10 mm satellite dish which can be an objective and will look great on a 6 mm table.
There are also assembly instructions on the website and I certainly needed it for the satellite dish and the first building, subsequent buildings were newer and don’t yet have instruction, but having done one I understood the format.
I must say as I constructed them I was amazed at the level of detail both in design and in construction with facias that needed adding and recessed lobbies; I was constantly saying, Wow and ‘that’s clever’.
I will certainly be ordering some more buildings and extra floors; I suspect an order of £50 is in the making.


The sheets are cleanly lasered with facias to add depth and lobbied areas. In the disassembled picture, note the 'tangs' that allow the levels to lock together.

Not sure if the Cinema is 'right' for my war zones, but I bought it with the intention of converting to some kind of HQ/bunker.
PS, Gareth Beamish  commented on Facebook:
Got one of these buildings at Warfare too. They're excellent for making ruins photo here.

Tuesday 17 October 2017

Giant Cactus 28 mm

An old one the idea dates back to 40k 4th edition with dangerous jungle plants

Using a polystyrene egg, I glued it onto a base using builders caulk, ('No Nails' melts the polystyrene).

Cocktail sticks are then pushed into the sides, and then cloves were pushed into the top for the flowers.


Wednesday 20 September 2017

Chaos Altar (Jungle trees) 28 mm

So what to do with the ball at the centre of the aquatic moss ball or indeed the spikes from the same ball?

Sometimes you just see potential in a piece of scrap add two stones, place the spikes correctly then thread your pentagon in place.

The prayer flags are just strips of paper printed with gobbledygook, reduced in size and then cut out, ink washed and then cut at the bottom to look frayed.

There were some interesting cracks in the stones, a little red paint in them and we are oozing blood.


Jungle terrain


Some years ago I decided to create some scenery for 40k, we are talking 3rd-4th edition.
At the time the rules on LOS were more liberally understood the area of terrain was considered to be the jungle edge and you could only see 2" in, anything beyond that or behind the scenery base was out of LOS. Later versions of 40k played if you could see it you could shoot it. Scenery therefore had to be more substantial if you wanted it to block LOS.

After a hiatus in gaming of two years I came back to my scenery and found it has been mouse chewed and soiled. (it had been stored in an outdoor shed) apparently there was no room in the house.

The original layout had been three pieces of terrain that worked individually or could be grouped to make one large piece. I'd done this by cutting the bases out of a single piece of 6mm mdf using a jigsaw.

No the picture isn't washed out, but the flock had come off  and it looked tired. In addition I had learnt new skills. So it was time for a full refurbishment.

When I first created them the supply of scenery items was from a florist supplier, this warehouse had occasional sales and I accessed my materials there.

I've since discovered plastic aquarium plants, although one of their biggest faults is a lack of height, However I worked out a way to get height, I also used plastic xmas tree branches.

Using a painting brush I removed the dust and debris, cleaned it up best I could. I then applied PVA where I wanted rough stone areas and then sprayed black undercoat over the entire model to sterilize it. Dry brushed the stones with two shades of grey in two stages, then applied PVA and flocked those 'grass' areas I wanted.

The aquatic plants usually come attached to a mat, a ball or individually based on 'stones'. I avoid the individual pieces as they are more expensive. If you look closely you can see the plastic is assembled using small spikes onto which the individual elements are pushed, I gently pull these apart with the intent to reassemble the elements onto a kebab stick or dowel.

First I drill a hole into the base where I want the 'tree/bush' cut a length of kebab stick and glue it in the hole if you get the drill size right it's a tight fit, a quick wash of brown for the dowel and then I push on the plant material, adding further pieces separating them as I see fit to produce my tree.


By using different plants you can produce quite a variety.

In some instance the dowel mab no more than 10mm high in others 60 mm.

Sometimes the elements break off or like the xmas tree elements have no hole to thread so I drill holes to size and glue in with PVA or 'No Nails'.

The stone slabs in the picture are simple squares cut from a cereal box.


If you do enough you can create quite an interestingly terrained tabletop. Of course it's up to you to decide if LOS is stopped by terrain pieces or not, but with enough as shown below, you can use actual LOS


Tuesday 19 September 2017

Alien Trees 28 mm

What sort of tree would you expect to find on Larisa third world of Betelgeuse 3?  I don't know either as I've not been yet, but I'd be surprised if they were like Earth's or indeed the ones below.
However I've never seen serious attempts at alien trees so thought I'd give it a go.


First off you need the inspiration and I saw it at 'Homebase' a dried floral bouquet.

The heads of the 'flowers' were obviously 'made' in some way and looked 'alien'.


I had previously made trees using wire and string and resorted to the same idea, odd numbers of wire were twisted together, spread out at the bottom so I could stand/glue the tree to a base.


Why odd numbers? Look around you, nature rarely has an even number of petals, leaves etc and even will always look wrong.

I started from the trunk and wrapped the string around the wire until I had the desired width and then tied it off at the end, I was going to cut it off neatly but saw the potential of dangling roots so left it long.


 I then wrapped string along the main trunk thickening at the bottom then coated it all with PVA to hold the string in place. I rather liked the effect and didn't want to hide it under caulk.


I'd earlier cut out some MDF, same shaped bases I'd left over from before. I used a router to make depressions for pools on the bases.

Placing any stone and grit with PVA I then undercoated the whole black.

Following the alien theme and being an Iron Warriors player I decided this might be a Chaos planet or one slowly converting.
Certainly it was scorched so I left the undercoat in place, dry brushing the rocks/grit grey, then added patches of PVA for scorched grass flock.  I dry brushed the trunks grey and then dry brushed the balls white to lighten the subsequent red and highlighted with orange. The end effect was darker than I liked but worked.

The pools were painted red then I poured PVA over and left it to dry, cheap water effect.
For some reason unknown now I wanted extra contrast so put on some snow flock.


For a 28 mm Cedar of Lebanon look here

Sunday 30 July 2017

Trees - Cedar of Lebanon 28 mm


Nothing quite like trees for getting us all going. For some of us the search to get the right good looking trees that fit, comes second only to that of getting the perfect rule set.

I've made a few over the years as I have failed to see how some of the offerings we used to get were at all compatible with 28 mm figures.
After all trees aren't two or three times bigger, they soar above us and nothings looks dafter than four inch trees (100 mm) alongside twelve inch  buildings (300 mm).
So much so that in 28 mm you will rarely see trees and building on the same table.


I was playing around with the idea of doing something different rather than a bristle brush offering and came up with this.

Two 28 mm LOTR figures are on the base and you can see the size. However I'm still not happy as I feel the trunk should be twice the size, so the model can hide behind it, but it's close.

In the second photo the same tree, revamped this year, some 8 years later and it begins to look like my objective. This is from a
Frostgrave shot with a Reaper mini and an even older LOTR figure Boromir, hate to think how old that is.

The trunk is still too narrow as I revamped the foliage rather than the trunk.


For those interested in construction.

Get some lengths of wire and twist them together.
I believe I started with six, twisting them from about two inches, using a vice and pliers. Where I wanted the first branch I separated out one piece of wire and twisted the remaining five strands, repeat for second and third, e.t.c., until you have two strands left. Normally you cut all the strands off at the point you want a branch to stop especially if you are doing a dead tree.(longer at the bottom, shorter at the top),
This time I made a giant loop of each strand.

The base of the wire strands were then splayed out to allow the tree to stand, whilst I left them at about two to three inches you can leave them longer and twist them to look like roots. I decided to 'glue' this to an old CD, windows 95 OS I believe, maybe I should have used an old 'Evergreens' cd.

I glued it using the same brown mastic that you might use on dark brown hardwood as it would save me painting it later. When set I then applied additional mastic to the trunk of the tree and branches smoothing up and down the trunk and along the branches to get a bark effect.
[NOTE, keep a small pot of water nearby and wet your fingers as you 'sculpt' the mastic this will stop it sticking to your fingers, also ensure you have tissues to wipe your fingers on after you are done in order to keep your partner happy.]

You can thicken the mastic up as mush as you want, either by wrapping string around the trunk first or by applying more mastic when the first is dry. A happy side effect is that when dry you can bend the branches or trunk to any shape you want as demonstrated by these two photos.

I then got some wire wool and partially threaded the loop through this gluing it in place and roughly positioning the branches horizontally. Lots more glue was the sprayed over the wire wool both on top and below the branches and then I drenched it with flock.

When I revisited the project I added more, better quality flock to top and underneath of branches, let it dry and sprayed and flocked again.
I then applied a sand/pva paste to the CD and when dry, dry brushed before flocking.
[Today I'd use brown wood filler].

I think the tree looks right with the buildings.


Of course today you can get excellent trees from 4ground, but at £24 for three trees?

So DIY still appeals to me as I can get the height I want too..

But 4grounds offerings are stunning.


If you want to see my take on a Si-Fi then look here Alien Trees 28 mm.

Index of Posts

An alphabetic list of articles Should there be any articles in black they are reminders to me to write it, those written and linked are in...