Showing posts with label Madgamers. Show all posts

Sunday 17 October 2021

Hands Up! - The Build part 2 'Getting serious'

I've made scenery with polystyrene, but as you may have discovered they have issues with getting a decent cut and shaping; lots of static small balls and it might melt if you've not protected it and use the wrong paint or glue.

Whilst the games boards made by the club in the past had been made from one or more layers of polystyrene based on chipboard; and have been very successful I didn't think a 100mm (4") height would work as well so I was seeking an alternative and as described in Cautious Beginnings I played with a piece of  the material used to insulate a flat roof in my home. It is Recticel Instafit Polyurethane Insulation board (Kingspan/Celotex).

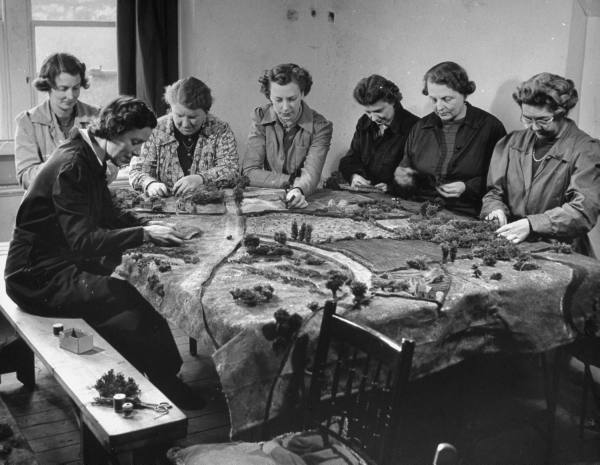
Luckily the island is very flat plateau and windswept so the only real elevation was the cliffs and the valleys where streams cut through the island's plateau as the period picture shows.


I discovered that at 100 mm the material:.

1)Has two layers of glass fibre sheet reinforcement through it so gloves should be used, the good news is that this also creates two stratum lines in cliffs, issues in other areas can be 'filled', it also makes a fantastic break line for you to create a new  horizontal level area.

2) Is very resistant to vertical pressure but gives easily if you push sideways into it. This allows you to shape the material with your gloved fingers and use your gloved hand to 'sand/polish' the finish.

3) It also gives off an odour that probably shouldn't be breathed in, as well as a fine dust, non static and easily hoovered up, [Warning clogs hoover quickly and probably also lungs so use a mask].

The plan was to use chipboard as a base, and then I would glue kingspan boards on top. (You know what happens to plans!)

Went to the local store and bought the chipboard and had it cut to size, (a must) and now have 5 times 2' x 5' boards. and ordered the Kingspan, 8' x 4' so needed three in order to get 5 lots of 2' x 5' happily these were delivered for a small charge.

Cutting the Kingspan to size was easy using a 'ripsaw' but I suggest you sandwich the Kingspan between two lined up pieces of chipboard, clamped together you will avoid cutting at an angle like I did with my first one. 
I had intended to use some hot wire tools I'd bought to cut Polystyrene to shape it, however they proved ineffective the material won't melt the same way. Thankfully it cuts well with a knife and sculpts quite well too, a little messy but thank god none of those balls, but still statically charged. I used a bread knife as I needed the length of blade, felt this was safer and found the Kingspan had two lines of woven glass fibre inside that a serrated knife could cut through. 

A lot of the work had been done for me by Chris Hall as I used his 'Map' as my template.


With boards and Kingspan cut to size I placed the Kingspan and then laid the 'Map' over the top allowing me to measure the Kingspan, look closely you can see the island already in place.

Having cut the Kingspan to length I peeled the aluminium foil off what would be the base as I felt the PVA glue would adhere the two elements better without it.


Peeling off the top layer of aluminium foil I started carving and modelling the material. Do use a mask!


The red lines show where the fibre glass mesh is and I used it to my advantage, the lower line became the highest point of the beach and street level in the town. I used a model knife to cut a 'V' for the valley and then formed the shape by simply rubbing my gloved fingers like sandpaper over it pushing away the waste. The cliffs were cut with a bread knife the mesh adding an unexpected bonus to the look.


However I couldn't sculpt the beach to my satisfaction and ended up using corrugated card, a layer by the seawall to raise that end and then a full beach piece peeling the back off the last inch to give me a sharper slope.


As you can see the sea is patterned wall paper. I put PVA on my beach and poured sand on. I also reinforced the sea wall with mastic just in case.

Once shaped to my satisfaction I applied PVA glue and sand to all cliff edged and beaches, reapplying when dry, you may need three thin coats, beware of applying too much sand/PVA as the mix will slide down the slope. When ready I started painting with ordinary emulsion paint.


Terrain skeleton complete, time for dressing.


Whilst this was for a 20mm game, the scenery was so flat any scale game could be played on it, although we began to limit ourselves with the placements we inserted, but it had to be done. Nonetheless one set of judges deemed it was a 10mm setup for a 20mm game, they ignored our research and the facts, apparently field lines should be man height hedges not low scrub even if the map and photographs showed otherwise.

Did I care, yes, however the best accolade for all our work came from a Frenchman who saw the game at Crisis in Antwerp, who pointed at the layout and named both island and town, a Result! Merci monsieur, très apprécié !

Moving onwards I used cheap towelling from ASDA (rough ground) and thin corduroy (farmland) from a local sowing shop. Builders caulk was applied to all roads and an old child truck (to scale) run along it whilst still wet to give me the ruts in the muddy roads.


One of my dislikes with pieced terrain boards is the joins I tried to mitigate this having flaps of terrain cloth overlapping the boards. Field cloth would extend beyond the board to the road edge on the next board. if you can't see what I mean in the above I've highlighted it below.


Me OTT? Yup! In the end I followed this idea with the town and fortress, despite hours of getting it just right I removed Kingspan replacing it with a piece of MDF, with wall paper cobbles that the town's building could sit on.


As you see that cover a lot of the joint.

To make packing for transport between shows easy and we went to a few in the UK and Crisis in Belgium. Nothing was glued in place.
To avoid damaging the board by pushing in and removing trees I inserted and glued rawlplugs into the board that allowed me to insert and remove the K&M trees easily.

The two pieces of MDF on the right of the above picture were my templates for building the fort seen in the picture below. I used Railway Scenic card to cover the walls and hide the Kingspan core.


The finished town with port and overlooking fort. It was the guns on this fort that had to be taken by the allies.


Finished Project


Transportation and storage mode.


At Bovington Tank Museum the Allies commence their seaborne assault.


Other articles on Hands Up!


Hands Up! 2010 MAD game

Some time at the beginning of the year (2010) at our regular painting evenings one of the group announced a change of plan to our 'annual game, rather than the ACW scenario we were thinking of playing he informed us that we would be doing a Rapid Fire scenario he had found, we would do it in 20 mm.

I was informed, that we would need my conservatory so we could build the scenery there and it was suggested to Tallyho that he do some research on the subject.

I don't think he was prepared for our response to what he had delegated, our interest was piqued by this little known operation and we soon discovered there was far more to it than as suggested in the original scenario he had discovered. Unfortunately our desire to properly represent the thoughts and planning that had gone into 'Operation Chastity' and 'Operation Hands Up!' resulted in a parting of the ways as our good friend felt we had taken over his project.

As a result I found myself tasked with building a 10' x 5' gaming table. Previous to this I had only done small pieces of 28 mm terrain, Jungle scenery  and Industrial scenery, so I was a little disconcerted.

Tallyho spent a lot of time researching the island 'Belle Isle Sur mer, 'Le Palais 'and the projected landing areas. As a result he had printed off a 10'x6' tabletop map.
The image below is of the first trial practice game, you can see how the map alone began to shape the projected terrain.


After the trial game it became apparent that some changes needed to be made to the map and my argument to reduce it's width from 6' to 5' was accepted as we hadn't used the inland 12" strip, so now as I had hoped it would fit in most hatchbacks. 

When we had first discussed the possibility of the game I had wanted 'the team' to consider some alternatives to the usual polystyrene boards

In part encouraged by Alcal's [of SoGGs] beautiful creations I had also wanted to incorporate some of the textured finishes I'd seen

For example, this from WW2 built for RAF pilots and navigators to recognise what terrain looks like from a great height.

Stunning work and so realistic, look at the shadows for example.

So I had to start thinking about materials not only to finish off the terrain, but also to build the boards.

Doing a little research I came across examples of people using felt, corduroy, towelling and carpet.

Previously we had used chipboard with a layer or two of polystyrene on top, with 'Artex' rendered on that to protect it.
From the site Terragenius

(How many times had I created a depression when gaming as an elbow or fist rested on those boards while measuring or moving a piece?)

Although I wanted something harder I also needed a serious 3D look, I had cliffs to build, I considered both blue Foam and Kingspan.


I decided on Kingspan as it was the cheapest.

I discovered

1) It has two layers of glass fibre sheet reinforcement through it so gloves should be used, the good news is that this also creates two stratum lines in cliffs, issues in other areas can be 'filled', it also makes a fantastic break line for you to create a new level area.

2) it is very resistant to vertical pressure but gives easily if you push sideways into it. This allows you to shape the material with your gloved fingers and use your gloved hand to 'sand/polish' the finish.

3) It also gives off an odour that probably shouldn't be breathed in, as well as a fine dust, non static and easily hoovered up, [warning clogs hoover quickly and probably also lungs so use a mask].

The following pictures show the sculpted board before I added the 'surface' features.

Next stage was to 'paint' this 3D canvass to look like these.

I wanted to ensure that the terrain was level with no attached buildings/projections so that it would be easier to pack/transport.

This would be made easier as the island is essentially a plateau with deep scrub and wood filled valleys.

I achieved texture by using cheap [ASDA] towelling, felt and corduroy, wall paper was used for cobbled streets and sea waves, oh and sand for the beach 😁 .

Some part finished and finished views, sorry about the 'yellow' picture, poor lighting.
 White areas still need painting or application of printed card, the fort still needs to be built.
Close up of the 'dock/port', town & fort bases are removable mdf inserts that hide the joins.
Finished lots more trees need to be pushed into place.

Thanks for reading this.


Credit to various suppliers for the buildings although Russ (aka Rusty Bullet) built the windmill and a number of other items whilst I built the Napoleonic fort. 

Other blogs on the same subject.

Hands Up! - The build (1) Cautious beginings

Hands Up!
If you read the earlier blog you'll know this was a whole new experience for me.
I'd thought of using Kingspan, having rescued a small piece from a local skip (as you do) I set out to test my theories.


Part of the map was a small offshore island, an extension of the peninsular that had become separated by time and tide, this would be my test and if successfully the first part of my terrain.
Using a serrated carving knife to cut to shape and then 'sculpt' the cliffs I was able to quickly throw this together, I then glued a piece of material (cheap white towel) on top, painted it green and then when dry painted PVA to sides and part of the top before pouring fine sand on top (child's sandpit sand). 

Here are some views of the island with turf ready for use, maybe a bit of painting to touch up the turf, with no beach required it's ready to glue in place or just place it on the terrain board.  


Here is the finished island.

It never was stuck onto the board as I feared it would be knocked off in transit. 


Satisfied with the result I braced myself for the main project.


Thursday 3 August 2017

Borodino AAR 30th July 2017

On Sunday 30th July we played a Black Powder game based on the Battle of Borodino.

Chris McGill had kindly organised the game and umpired throughout, ensuring I didn't use Hail Caesar rules which are close enough to throw you off especially if like me you've been playing that a lot and not Black Powder.

Denis Jackman, Xavier Jackman played the French, Trev Crook and myself played the Russians. The French objective? Simple, push a hole through the Russian army and March on to Moscow.

The Russian were set up first then the French would be deployed.

Because we place the hills under the cloth they don't easily show up. So I have marked the isolated hill at the front, behind which is the redoubt and marked a line behind it which shows the foot of the next line of hills, the army is positioned on the crest.

After Chris had placed the units I was asked if I would like to make any changes. Seeing the redoubt I decided to put some guns there and 4 units of infantry.

Trev declined to advise although he knew the battle well. 
It seems that the redoubt had been built in the wrong place and on the day when Kutuzov arrived he ignored it, placing Jagger on the hill in front. Trev obviously wanted me to learn from experience.

At the top of the picture is Bordino and the river runs across the cloth behind it. Cossack units were
positioned there. Units were placed in the in the town at the bottom of the map and another in the woods at the bottom of the page.

The French deploy, their right wing remains off table as a reserve


We waited to see what Napoleon (Denis) and Ney (Xaviar) would do.


As I expected Denis declined a flank, but with units off table in reserve I couldn't initiate a move up table leaving as that would leave an open invitation to Moscow.


As the attackers the French advanced first.

Denis' units move more or less to order too many moving three paces forwards, however a brigade blundered veering into range of
the artillery in the redoubt.

My flurry of firing was statistically OK but there were too many units incoming to have much affect.

In addition French attack columns rolls a 3+ moral/save against musket fire.

I certainly wasn't going to get the three rounds of firing I'd hoped for and needed.


                               The Russian brigades stoically await the French Tsunami.
All is still quiet at Semenovskaia


An eagle's view of Semenovskaia and the woods to it's south 
which the troops surround and protect as well as the woods to their South.


The French second move brings them into contact with the Russian centre.


Denis command the Old Guard and Young Guard in, unlike Napoleon, I don't believe they fought at Borodino but rather cheered on their
comrades.

Whilst they have moved in there has not yet been 'a roll' for incoming fire. The Young Guard rashely charging the cannon withdraw disordered as it fires into their column.


After combat and indeed the next turn little has been achieved by the Russians, but much by the French, a full brigade to the north of the Old Guard's initial attack (right in pic) has collapsed under the French attack.
One unit of Old guard has pushed through. (the unit it attacked rolled snake eyes for it's break test, forcing the unit behind to test, snake eyes again and OFC the supporting gun goes automatically.


The big picture


Turn four - on the rest of the battle field the Russians try to move their troops towards the centre, a vain attempt to stop the beginning of the end.

Whilst cavalry brigades attempt to slow the French long enough for help to arrive.

Cossack even coming through a ford to assist and prevent the French cavalry from becoming too aggressive south of the river. They did better than expected.

This withdrawal of a third of the Cossacks encouraged the French Cavalry to attack those remaining north of the river. With very mixed results, the Cossack fared better than they should.

The French would be eating their own horse meat.


Now the French right wing appears so as to discourage any more northwards movement.


End of turn five and the Cavalry's attempts to slow the advance are clearly failing and with no
infantry or artillery to support, there is little they can do.


A wise commander would at this point withdraw and save resources for the next battle.


A French victory!


A view of the final battlefield as Russian troops evade the French in order to redeploy again closer to Moscow.


Denis Jackman's account can be found here


Photos here.


OOB and other docs found here


Probably my favourite photo, a view up the battle filed North East to Borodino

------------------------------------------------------------------------------------------------------------------

Note 1:
The Order of play in Black powder as written should be Initiative, Command movement then fire.
This means you can walk up to the enemy line shoot it, maybe disorder it and attack in your next turn when it is no longer disordered.

We use what I understand has become a widely accepted alternate order of play; shoot, Initiative, Command finally movement.

This means you can't walk up to an enemy unit and fire at it from 2". (unrealistic.)
It does mean you can fire at it from multiple units, disorder it (you hope) then try to charge it. (which to me seems more realistic.)

Note 2;
Distance, lots of people have differing ways of transferring measurements form 28 mm games to 6 mm games, in my club we use inches but halve the movement and reduce range to 1/6th. The does limit the amount of long distance shooting you can get in. In the opinion of the history buffs inmy club, this better reflects the reality of the time.

For a full AAR of the Battle of Borodino go to this link Battle of Borodino 7th September 1812.
I've copied in their map of the battle and you can seeat the centre the unoccupied redoubt with Russian Jagger deployed on the hill in front.


 Map of the Battle of Borodino, 1812.
        N - Napoleon, K - Kutuzov       
                                                                

    (c)   http://www.napolun.com     


Google Earth image of the battlefield today, Russian spellings.


Thursday 27 July 2017

Lucky Dice? - B***dy Dice! - An article written 8th March 2004

When we started the Madgamers club we decided to run a small in house magazine, we called it Insanity.

I have rescued for your entertainment and mine some of the nonsense I wrote back then, this, the first I found to post but not first article, was most definitely triggered by some of the people I played against. I didn't just imagine all these traits.


Lucky Dice? – B****y Dice!
Many things can influence a player’s success on the field of battle:
  1. The way he places his forces on the table, in relation to the enemy’s units.
  2. His use of cover and terrain to its best advantage.
  3. His placement of units so they support each other, giving covering fire etc.
As everybody knows all games demonstrate the player’s skills and have nothing to do with luck.
The fact that the opposing general has had an appalling sequence of dice throws and therefore loses in no way detracts from the winner’s skilled play and disposition of his forces.
The cry of, ‘He had all the luck, his dice throws always give him what he need,’ should be ignored. The loser’s dice rolls were probably just as lucky or unlucky as the winner’s. The winner ‘merely’ managed his luck ill or good better than you did! Remember Napoleon is reported to have said, that he only wanted Generals who were lucky. However in truth a lucky general is one who has planed ahead and is prepared to take advantage of his luck and arranged his forces to limit the damage in the event of bad luck.
Rubbish this only applies when you are winning!
Everybody knows it was the role of the dice that made you lose, a one or six at the crucial point would have made all the difference in the world. If you had had his luck and he your ill fortune, naturally you would have won.
In gaming the roll of dice can really can influence a game, especially if you’re the sort of player whose tactic is to rely on the throw of the dice. As a result of the fickle offerings of lady luck many of us have developed techniques or quirks that improve our luck. Some of these are listed below, you may recognise them, I trust you don’t use all of them!
I dropped it!      A player picks up his dice and ‘accidentally’ drops one or more of them. If they fall correctly he calmly rolls the rest in such away that it appears to be a single roll. If they fall badly, he calls out, ‘I dropped that’, picks them up and rolls again.
Oops, sorry!       His dice roll scatters into your unit knocking them back, as he generously stands your men back up, he place them within assault range of his troops. Where he was rolling armour saves then naturally they will now be out of range and you will be unable to assault him!
Scatter roll.        The player rolls his dice in such a way they collide with dice resting on the table. Any sixes within the scatter range can be claimed as rolled that turn. If there are none he can claim that the collision of dice affected the outcome or that he can’t tell which are his dice and re-roll all his dice. (The collision claim is also useable in Oops, Sorry!)
Jelly drop.          The dice are picked up in such away that if skilfully dropped they will not roll, but rather land with the desired number face up. Heavy dice are ideal for this as is a soft sticky landing pad, jammy bread is perfect.
Tilt!                    A dice that rolls with the correct value face up is not tilted even if the degrees of tilt exceeds 80o, however if the roll is wrong a tilt of 5oor less, is deemed sufficient to warrant a re-roll. The keener player will come prepared with a level for this and will argue over a list of one degree. The correct application of a level is not printable on these hallowed pages.
Rough ground.  A variation of ‘Tilt!’ almost as if it were master crafted! The rough terrain with its lumps and bumps will offer many more tilting opportunities; hence more dice will be available for re-roll or not as required.
Too many.          Pick up more dice than allowed and roll them into resting dice, identify only those with the right result, ignore others. Best used in conjunction with the ‘Scatter roll’.
How many?       When instructed to roll five armour save dice, refuse those offered by the opponent, (see quirks #1), instead pick up individual dice, counting slowly, fumble and drop dice and begin counting again, enquire as to the number of dice e.g. ‘Four wasn’t it?’ then roll the four dice. If they all save and the opponent doesn’t query continue with the game, if challenged roll one more. If they fail to save recognise your error e.g. ‘Sorry it was five wasn’t it?’ then re-roll all five dice.
Quirks.
1.      Never accept dice rolled by an opponent, you don’t want his aura to affect your roll.
2.      Always hide his lucky dice and use them yourself.
3.      Don’t let him touch your lucky dice reclaim and hide them immediately.
4.      Pick up sixes when you want to throw a one, conversely pick up ones and twos when a six is required after all a dice wont roll the same number twice will it!
5.      Roll dice one at a time, each can then be individually blessed, blown on or kissed.
Well I hope that all helps and has perhaps raised a smile.
But please remember this, if you’re winning and luck is going your way shut up and enjoy. Don’t gloat.
If luck is not going your way, grin and bear it. Even if there is no way you will win and the game is pointless, continue to the bitter end. Why?
1.      This may be the first game your opponent has won in a long time and why shouldn’t the poor sod enjoy full sweet victory. (You’ll want the favour returned wont you.)
2.      Remember the dice will change, especially if you hide his lucky ones.

Dranask Wolfsbane 

(aka Mark EA Foulds)

8th March 2004  

This article was first posted to the in house magazine Insanity in 2004

Lizard Men - Lost Children of the Fallen Gods

My first WHF armies way back in 1996 were from the 5th edition box set; Bretonnians and Lizard Men, my son and I had a blast with those mode...