I hadn't realised I'd not added these to my blog in 2022.
Anyway for the record I plan to do a fourth combined Pike & Shotte for the Royalists
I hadn't realised I'd not added these to my blog in 2022.
Anyway for the record I plan to do a fourth combined Pike & Shotte for the Royalists
My Royalist army is getting bigger with the arrival of their Medium Cannon and Galloper guns, unfortunately for them the Parliamentary guns arrived too.
The range is a little close.
Men and guns from Pendraken and Gabions from Last Man Last Bullet
Pike and Shotte
The challenge: Do it in 10mm keep basing simple and standardise to other 10mm games we play HC! and a Fantasy addon game I'm developing.
The participants were a Teacher who had written a thesis on the ECW for his masters, a reenactor-wargamer and myself a simple wargamer, but my business life had been spent as a project manager. As a team we work well get ideas, facts and concepts sorted.
We wanted to do it in 10mm and we didn't like the idea of the Combined P&S unit's Shotte sub units walking off to some other location away from the Pike, which we have seen done by others. So we resolved to base them together so nobody could separate them.
Then in the 'To Kill A King' supplement. we found on pages 144-147 special units for the period. So that is a must purchase alongside the main rule book if you want to play ECW.
Wound and Stamina marking - Why are there little pegs on your bases?
Wound markers - Why are there little poles on your bases?
 |
Picture above says it all without the waffle. |
We were using small dice green indicating wounds, replaced with a red die when they were shaken. These also get left behind and worse would get knocked so five wounds became one. Using dice holders gave mixed results, some too tight you can't get the dice out, or too loose and fall out.
Then we started playing a lot of Hail Caesar! and it soon became clear we had to identify which units belonged to an HQ, to stop errors in command.
SWMBO required a trip to IKEA and I saw a cheap version of Hama beads 'PYSSLA' and the solution came to me.
Use the beads at one rear corner to denote wounds using the current colour system, use the other colours on the other edge to denote HQ and its units.
This is a 10 point Stamina version whilst HC goes up to 8 stamina I allowed for the possibility of 10 stamina. (Fantasy version with Monsters).
Each red dice represent a point where the unit might be shaken, depending on what its stamina is 4, 6, 8 or 10 use red or if unit has a higher stamina value use the pink, orange or black token at that point instead.
Whilst in fantasy I don't care what colour I use I do like to be more accurate in the historical setting, I like to think I'm painting a plausibly accurate colour.
I suspect a lot of the Wargaming source material is opinion, sometimes very objective, but we don't really know what colours the Cretan archers wore but here are some interesting links.
From the historic perspective, indicating the availability of colours.
I was surprised at the range of colours and their shades and then how colours or their shades were restricted to certain classes of people,
From which this excerpt comes
Notes about colours
It must be noted that just because it was possible for a colour to be dyed, it did not mean that it was instantly adopted by all walks of life. Many colours were deemed unsuitable for the peasant class. Bright colours, it was thought, were not humble and engendered a feeling of pride which was a mortal sin. Peasants should remember where it was that God had seen fit to place them, and they should not desire anything other than God's will.
Clothing in greys, browns and muted blues were thought most suitable for the lower class. This did not mean that peasants were dowdy. Greys and browns were available in a number of shades and clever colour coordination of hoods and tunics could still make for an attractive ensemble. Blue was a colour which was available to most classes, both cheaply and expensively, in all shades ranging from muted, sombre blues to brilliant jewel blues of the upper classes.
Medieval fabrics and its uses
More about the fabrics available
Medieval fabrics and the use of colour
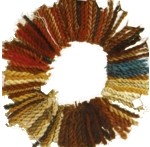
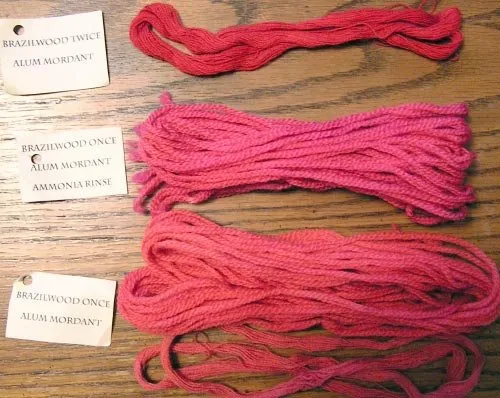
This is a good read with a number of colour pictures of the dyed wool. from which this picture comes
 |
| Weld yellow to woad blue to produce greens |
 |
| Plant coloured wool |
 |
| Walnut Hull dyed yarn, naturally dyed |
Natural dyes Wikipedia link
I wanted to have a tropical feel with a rich grass base with pools of water and spikey plants.
My gaming skills are OK, dice rolls lucky, painting adequate, but I do get compliments for my scenery. It's not world class but in my peer group often complimented.
I've been asked how I make my scenery so I thought I'd show how I source and use the materials.
I use all the plastic plant material I can find but there are three basic targeted sources.As you can see it would make a palm tree or a fern depending on the scale.
 |
| This composite image shows just a few of the possibilities. |
Index
Recently got into this old game again, I say old as I played it when it first came out in 2001 but I wasn't overwhelmed at the time even though I'd read all the books in the 1970 and many times since and even The Silmarillion twice.
Either the rules or I have changed sufficiently for me to pick it up and play and I've gone down the inevitable route of buying units to make a fighting force with a little extra so I can tweak for variety.
Having played a few games with friends and using proxy pieces, as well as original unpainted plastics I'd bought in 2001. (Is it really 23 years ago!😰) I decided I needed to assemble some forces, Minas Tirith and Mordor were obvious starters as I had the original ancient plastics.
I then purchased the Mordor Battlehost box and started to assemble the wargs as a newbie player I'd managed a few game with proxy pieces before assembling my wargs. and learnt that either the rider or mount could continue alone and this is reflected in my assembly.
I assembled the Wargs enlarging the hole to glue in a small magnet and painted them up.
 |
| Wargs undercoated and prepped with magnets |
 |
| Painting position |
When I'd finished I removed the sprue and tag that slots into the Warg, drilled a hole at that point glued in the top of a panel pin and voila, separateable riders and mounts, no need to buy spare Wargs.
Drilled a hole with a small 0.6mm bit using it to locate the position as I find I have more control and it gives the larger bit something to fix on. Also if it's not quite right you can alter the point of entry with the larger bit.
The panel pins I used have a 1mm shaft, a 2mm head slightly bevelled at the top. Using a 1mm bit I drilled into the prepared position and when that was deep enough a short way with the 2mm bit. As nothing is ever exact I used a 3mm bit to help counter sink the panel pin's head. I did this just using the bit with my fingers, a single turn is enough. Why not fix it in the drill? I feel it gave me more control, slowed me down and stopped it going too deep.
 |
| Ready for the panel pin. |
Why a panel pin + magnet rather than 2 magnets? Well the pin will fit anywhere on the magnet, so you can choose the position of the model. A magnet would over-ride your choice and place it where it wants it. Oh and get the magnets the wrong way around and the opposite poles will reject any idea of placing them together.
 |
| Tools for the job |
I also have a thing about Arrows, some models call out for them.
I used the small drill bit 0.6mm as my pins are 0.5mm wide I drill into the hand to create a hole for the arrow/pin.
I then push the sharp end into the hand, align it with the bow and cut off at the required length. This leaves you with a nice sharp arrow.
Remove the pin push the sharp end into BluTack paint twice.
Apply glue to blunt end use that to dab glue on bow above fist then push blunt end into hole you drilled and push home with a block of wood, against the sharp end of the wood. I don't recommend pushing in with your fingers.
When secure paint the end of the pin with bolt gun or whatever your metal choice is.
If you look closely you might notice I have four types of Warg positions. In the box you only get two variants 'A' and 'B' did you know you could glue Left 'A' to right 'B' and Left 'B' to right 'A' swopping the sides?
Myself and Christoph played our first game of Battlegroup and wanted a game with a minimal number of models rather than jumping in at the de...
